Hilow! Happy new year to you all! How you doing? How you living? Hopefully you're great and the year is off to a great start for you! I'm doing alright only I'm getting over the flu.
For my first post of Blog Renovation Fridays I want to share something that I learned last year. When I wanted to begin blogging I did some research on tips to having a successful blog. Each resource I found emphasized consistency, being yourself, having great content and of course good quality pictures. Everyone said, "you need to have a decent camera" and sure enough because of this I stalled on starting due to not having a good camera (well this is one of the reasons I stalled. -_-)
But now that I'm reflecting on it if I knew this tip then I would have started much earlier. So! I'm sharing this with you just in case you're thinking about starting your own blog and you think you don't have the necessary resources: I implore you begin where you are and make your way up.
Last year, I went to my first Makeup Show where I bought my first lipstick. Yay! But that's not the focus today: back to this. I got home and wanted to take a photo of my lipstick for Instagram but it was dark and I wasn't getting any good lighting. I took the photo with my phone but it wasn't looking right. Then I had this bright idea to use a lamp and see where that would take me.
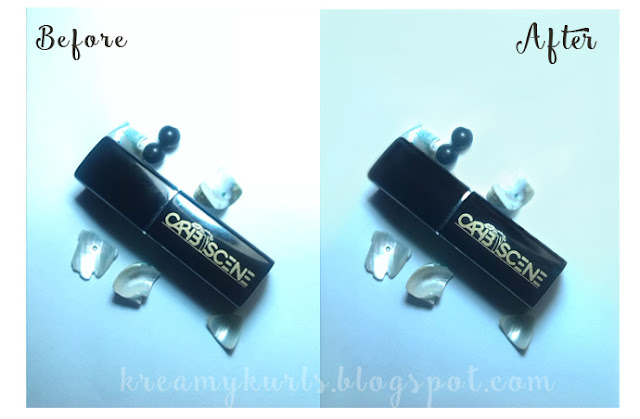
The most important thing about taking pictures with your phone is composition. If you have your items organized neatly and a clean-solid background: you're already way ahead of the game. (That is if you're taking pictures of products for review or a haul for example) The real work comes in post production. Now, there are plenty of photo editing software available but for this post I'll be showing you how I fixed this photo in Photoshop.
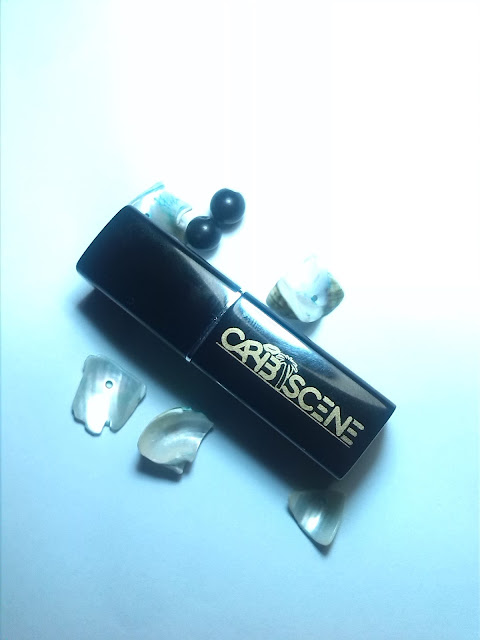
- Here's my set up: I got a computer sheet, some beads from a bracelet and a lamp. The computer sheet was used for the background and the light source was shining down on the subject/product.
I switched the light off and turned on the lamp then used my phone to take some pictures. I held my phone directly over the lipstick and took a series of pictures.
After going through this was the best from the bunch. But, has you can see the light was too bright in the top right hand corner.
Now the fun part: I sent this picture to my email, downloaded it and then opened it up into Photoshop. I have Adobe Photoshop CS5.1
Looking at the picture I needed to do one main thing and that was to blend the top right in with the rest of the background. By the way the sheet didn't photograph white but a more bluish colour.
1. At the bottom right there's an icon that resembles a square this is the layers button (highlighted below) you're going to click it once. Adding a layer simply gives you the opportunity to make adjustments to your image without ruining the original. Whatever adjustments you make, if you decide you don't want it anymore you can discard it and you still have the original.
2. Now that we have our layer and this is called Layer 1 we are now going to access our brush tool on the left side bar. The brush tool (highlighted below) is right below the Healing Brush tool which is the icon that looks like a bandage.
3. Not so bad right! Now let's do some painting. On the same side bar that you found the brush tool the second to last item on the bar is where we can set our foreground colour (circled below). You can also think of this as your colour palette.
4. Double-click on the first square and you will see a box titled Colour Picker (Foreground Colour) open. Hover the cursor over your image and you'll see the eyedropper tool appear. I wasn't able to get it in this picture below because of the screenshot but you can see the eyedropper tool is selected on the sidebar.
5. With the eyedropper tool I clicked various areas to see which colour seems most suitable. For this picture I tried to blend that harsh light on the top right and so I selected three specific areas to see which colour/s was the best.
6. I decided to use the suggested colours from two areas I selected to add depth. Here are the colours that I got.
7. With the brush, colours and layer selected I began painting. I put my opacity (19%) and flow (12%) quite low so that the colours blend well together and I could have control of how low or intense the colours got.
8. Paint and blend the colours together. Both colours wont work at the same time so you'll have to stop and swap them from time to time. This is what it looked like afterwards
9. The beauty about painting on a layer is that you can always use the eraser to remove any mess. I painted over the lipstick while doing the background; however, I wasn't worried because I knew I could use the eraser to fix that.
This is my image before I used the eraser.
This is my image after using the eraser
10. Creating another layer and following steps 1-5: I am going to paint the case of the lipstick and darken the beads as well.
Why?
1) to darken it (Lipstick + beads)
2) to get rid of the harsh light spot on it. (Lipstick)
Here's what it looks like after doing that.
11. On the right column below our preview image I'm going to select adjustments (circled below).
12. Then the first icon which is called brightness and contrast.
13. Then I messed around with the levers on both the brightness and contrast until I was pleased with how my image looks.
What do you use to take and edit pictures for your blog?
I'd love to know!


No comments:
Post a Comment